Hi Gang,
Wasn't sure whether to split this into three topics but decided to dump it all in one post, I can be split it if preferred.
I am based in the UK and as such Hobie parts are expensive when taking into account shipping costs from the US and customs import taxes.
Hobie 14 Turbo restoration.
1) 3d printed swivel base (Mainsheet)
2) Mast base and step conversion to Hobie Wave ball type. (Home turned ball)
3) Homemade Vinyl Trampoline
Initial Condition, cutting away plantation:
 1) 3d Printed swivel pad
Knocked up a design in Autodesk Fusion360.
Printing on Delta printer in PETG for strength.

Note: I used a trick an old timer engineer taught me many years ago for precisely measuring contours, such as that used for the rear beam.
I'll try to explain it here as can't find a picture as it could come in useful.
Cut out a rectangle of corrugated cardboard and stick a bunch of those wooden cocktail sticks between the outer layers along its length but not completely embedded.
Level the stick out against a table, then press the stick against the form you wish to copy.
Lay card with sticks flat to paper and trace out the end of the sticks. Works great for non uniform curves. Hope that made sense.

 2) Converting mast base and step (70's version limited rake) to ball so as to provide greater rake.
Original:

Ball Step, the ball itself was turned on my metal lathe employing delrin and a homebuilt ball turning attachment.
The front screw is temporary as it was all I had at hand, will swap for an engineering bolt or cap screw.
The screw was required as there was a hole in the spot too large for the rivet.
opened and cleaned up hole squeezed in a Rivnut to accept screw.
Old holes to be filled.

Old and new mast base

Riveting mast base.
The blue material is a piece of nitrile glove, thought behind this was to aid in sealing rivet along with galvanic isolation, not sure if it will be useful. :shrug:
 3) Homemade H14turbo trampoline (Warning: Its not pretty but is functional)
Confession:
Started out with older H16 vinyl tramp that had crumbling UV deteriorated thread and corroded eyelets but material was sound.
Used the old stiff H14T tramp as template.
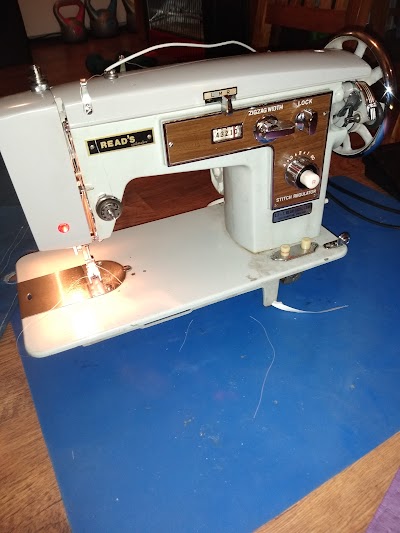
Reads Sailmaker Sewing Machine:
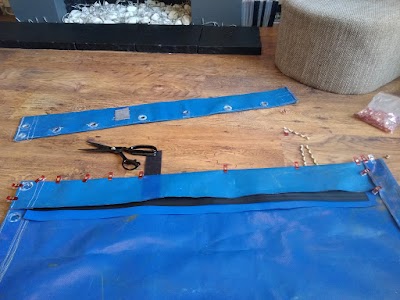
Shortening the H16 tramp to match H14, added supporting vinyl and webbing between layers for extra strength, eyelets to be punched.

Homemade punch turned on lathe and new spur grommet inserted:

I said it wasn't pretty, had major issues with sewing machine and the fact of having only two hands


In the absence of large spur grommets for Jib becket blocks,
turned my own on the lathe from 40mm Delrin / Acetal rod,
they are then sewn into the top and bottom of the trampoline with twine.
Bored and drilled prior to parting into four section pieces.

They can be seen located and sewn into tramp.

Trampoline on the boat, hiking straps sewn on, guess it doesn't look to bad from a distance


