This is actually a pretty simple procedure that does not really require printed instructions (and Hobie supplies none), but there are a couple of points worth noting The first point (important!) is to save the old parts (i.e., the old clevis pins) because you will need them for the new installation.
1. The first pic shows the pre-2005 drive (with the SS mast holders and sprockets). It was surprising how similar in overall dimensions the new fins are to the old ones. It was only near, and at the tip that there was really a distinct difference in shape.
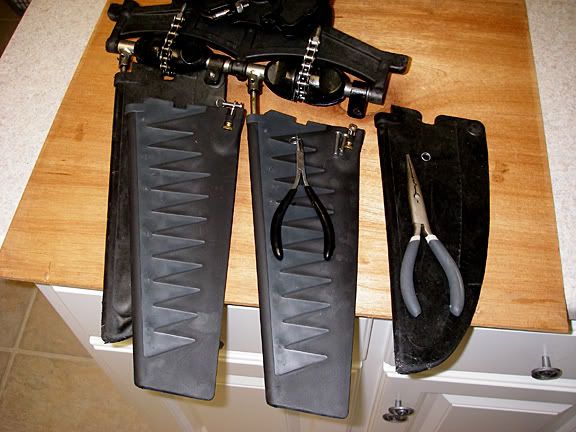
2. If you happen to be a fisherman and have a pair of inexpensive split ring pliers, now would be a good time to dig them out of the ole tackle box. Note at the upper left of the pic that there are two clevis pins (i.e., a pin with a flanged head, a shank, and a flattened tip with a hole thru which the split ring passes). The short clevis pin comes with the new fins, but is pretty useless for this install since it is about ¼ inch too short. So—save your old pins and use them with the new split rings that come with each fin (that are sold separately, btw). Remove the first split ring and clevis pin, slide the old fin off the mast, slip the new fin on, and secure the old clevis pin with one of the new split rings.
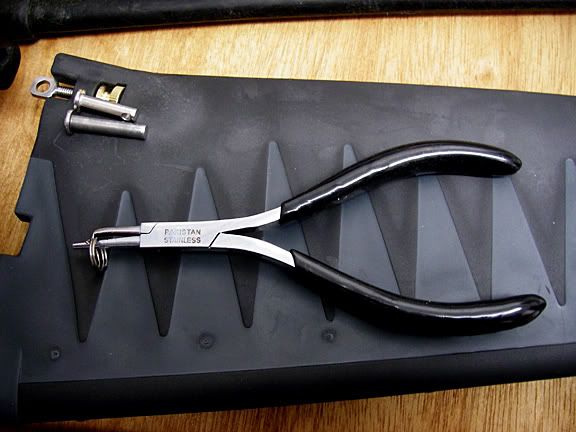
3. In fact, here is the clevis pin and split ring assembly that comes with each new fin. Note the knurled brass screw, otherwise known as the clew adjusting screw (the clew on a sail is the aft, or rear corner, so here we are talking about the aft part of the fin, or “sailâ€


