Return to Hobie.com
Hobie Forums
It is currently Tue Aug 26, 2025 2:50 pm

All times are UTC - 8 hours [ DST ]


Post new topic Reply to topic  [ 133 posts ]  Go to page Previous  1 ... 4, 5, 6, 7, 8, 9  Next
Author Message
PostPosted: Sat Apr 04, 2015 9:10 am 
Offline
Site Rank - Old Salt

Joined: Sat Jan 14, 2012 8:24 pm
Posts: 780
Location: Houston, TX
When it comes to the heaving to, I found it to be dependent on the winds. In winds less than about 12mph, the AI/jib heaves to very well. I have a video I will post soon. But as the winds increase, I noticed some lee helm which caused more drift while hove to. So it is fine for a break on the water or to fix something in light to moderate winds but I would not count on it as a high wind storm tactic. For storms, I'm looking for a rig to hook up to or I'm going to deploy a sea anchor I have. (Or maybe just stay home? :D )

Vetgam

_________________
Greg

2016 AI - Spinn & Jib

“Out of sight of land the sailor feels safe. It is the beach that worries him.”
– Charles G. Davis

Image


Last edited by vetgam on Sat Apr 04, 2015 9:26 am, edited 1 time in total.

Top
 Profile  
 
PostPosted: Sat Apr 04, 2015 9:24 am 
Offline
Site Rank - Old Salt

Joined: Sat Jan 14, 2012 8:24 pm
Posts: 780
Location: Houston, TX
Can someone explain what type a sail this reacher is and how it is used? I'm assuming it a form of a small spinnaker used for reaching only. Correct? I'm also assuming that these guys have found a way to snuff the reacher using a snuff on the tramps (great idea as bow is too short) based on what I saw in the videos

Vetgam

_________________
Greg

2016 AI - Spinn & Jib

“Out of sight of land the sailor feels safe. It is the beach that worries him.”
– Charles G. Davis

Image


Top
 Profile  
 
PostPosted: Wed Apr 08, 2015 11:10 am 
Offline
Site Rank - Old Salt

Joined: Sat Jan 14, 2012 8:24 pm
Posts: 780
Location: Houston, TX
Promised a video of my first outing with the Jib so here it is. The FlexiBoom trial is in this too.


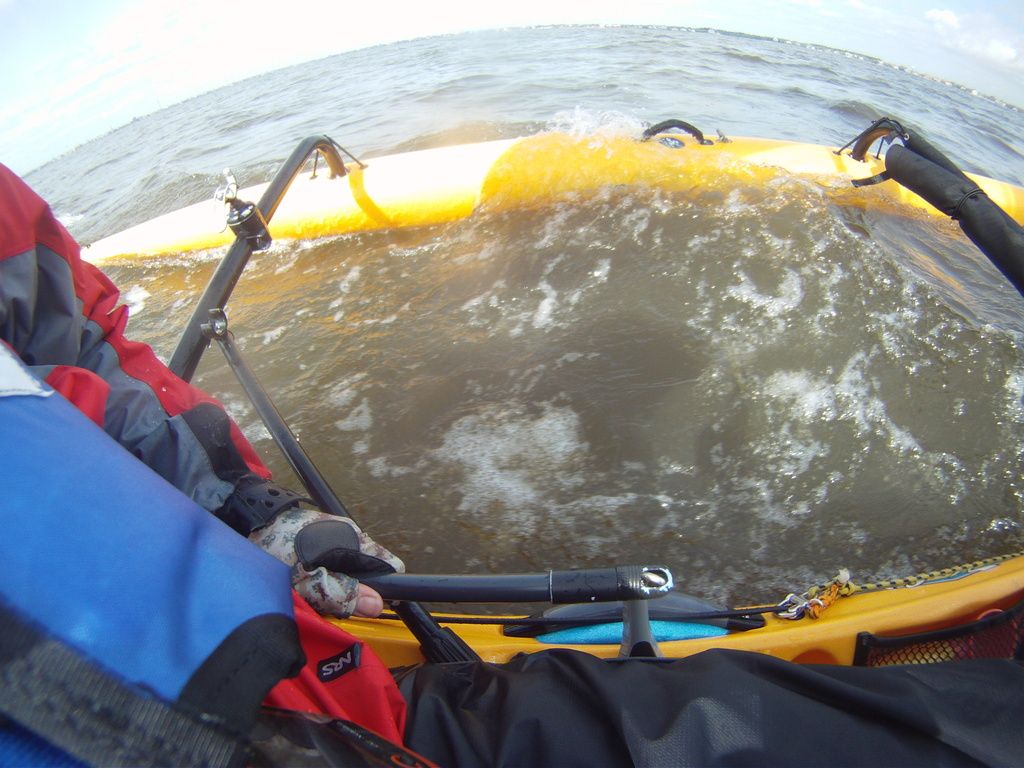
Also tried to take a video of my solution to the handle splash but turns out I was only taking pictures. So here is a picture with and without the solution. Cut a section of pool noodle and just shoved it in the handle. Stays in place without the need to tie it in and it works great.

Image

Image

Vetgam

_________________
Greg

2016 AI - Spinn & Jib

“Out of sight of land the sailor feels safe. It is the beach that worries him.”
– Charles G. Davis

Image


Top
 Profile  
 
PostPosted: Wed Apr 08, 2015 12:53 pm 
Offline
Site Rank - Old Salt

Joined: Sun Apr 20, 2008 6:18 am
Posts: 3062
Location: Sarasota,Key West FL
Vetgam:
I got pretty much the same results with my regular (non wing) jib (added about 1.5 to 2mph speed) when on a reach. The best thing the jib did for me was in really low winds (pretty typical around here) I got a little better performance, and I was able to point much closer to the wind upwind. With a normal jib (not a wing sail) I was able to point around 30 degrees off the wind upwind, where without it, I could point maybe 40-45 deg off the wind. That's about it.

Since I'm usually going upwind around here (the bay is very narrow, and wind is usually from the south) I find pedaling and pulling both the jib and main very tight, I can actually sail upwind very close to the wind (but you have to pedal). However the configuration is un-natural and you have to control the rudder pretty well or you just round up into the wind and stop (actually I sail this way a lot).
Hope this helps
Bob


Top
 Profile  
 
PostPosted: Fri Apr 10, 2015 1:20 am 
Offline
Site Rank - Old Salt

Joined: Tue May 18, 2010 2:31 pm
Posts: 3068
Location: Kailua 96734
Runs real smoothly, from my pov. The video doesn't though, on YouTube right now.

Great hove to results. Was the rudder fully reversed?

Would you show us the mast bending next time, please?

It looks like there's a biner or small block dangling from the jib clew. If so, it would help make a great outhaul for the jib, if clipped to a line coming from the fron Akas. Wing a wing would really be optimized that way.

I can easily imagine that jib profile on a 2015 with Hakas. Man, would that shred. :mrgreen:

Nice work VG. Thanks for letting us ride along.


Top
 Profile  
 
PostPosted: Fri Apr 10, 2015 5:16 am 
Offline
Site Rank - Old Salt

Joined: Sun Apr 20, 2008 6:18 am
Posts: 3062
Location: Sarasota,Key West FL
VG
I'm very impressed with that jib, most jibs are designed for stayed masts that aren't so bendy, then when you try to put them on a bendy mast they bow way out in the middle like a 'C', yours bows also, but it looks to remain effective even when bowed (quite a feat), thats the reason most of us put in fore masts (to prevent the bending). I think yours is fine without the need for a fore mast.
I think the mast on the TI is a little more bendy than your AI mast, when I'm going wing on wing downwind with my TI, my mast bends way forward and tends to try and bury the bow underwater (what I call nautilus mode), this is when the bow goes under and just stays under and the boat goes into submarine mode until you back off on the power (I'm never willing to do that (lol)). I suspect this only occurs on the TI because the main mast is mounted way further forward vs the AI. Just FYI to cure the problem on my TI I added a rear stay line to prevent the mast from bending forward (only on downwind), and I added a bow sprit and moved the bottom of my jib forward about 8-10 inches so now with the jib tilted, it also creates lift to lift the bow out of the water. I also kind of need a mast on the fore sail to keep it from bending so much, the mast also makes it a little easier to incorporate a furler. Actually I added the rear stay more for my giant spinnaker (130 sq ft) than the jib. If you deploy the big spinnaker in 15-20 mph down winds without the rear stay in place, it snaps that little stud at the base of the mast pretty much every time, and I'm pretty sure it would also snap the mast without the stay (the big spinnaker (not the jib)). From what I'm seeing from your video, you don't need any of that extra crap. Actually I hardly ever use that spinnaker anymore, I get acceptable downwind performance running wing on wing with just the jib with a barbor hauler on the main, the only place I still use the spinnaker anymore is offshore around Key West where we have nice steady trade winds (down wind only). Nice job.
Bob


Top
 Profile  
 
PostPosted: Fri Apr 10, 2015 3:09 pm 
Offline
Site Rank - Old Salt

Joined: Sat Jan 14, 2012 8:24 pm
Posts: 780
Location: Houston, TX
Great hove to results. Was the rudder fully reversed?

Yes, fully reversed. There is no reserve for higher winds and with them, lee helm sets in. Higher winds are no a problem when sailing but it makes heaving to difficult and less effective.

Would you show us the mast bending next time, please?

Heading out this weekend and will try to take a picture with my phone instead of the Go Pro (fish eye lens distorts image)

It looks like there's a biner or small block dangling from the jib clew. If so, it would help make a great outhaul for the jib, if clipped to a line coming from the fron Akas. Wing a wing would really be optimized that way.

Never thought of that! Good idea although I'm not sure I can get myself to add another line to this boat! Will have to give it a try though I'm sure.

Vetgam

_________________
Greg

2016 AI - Spinn & Jib

“Out of sight of land the sailor feels safe. It is the beach that worries him.”
– Charles G. Davis

Image


Top
 Profile  
 
PostPosted: Fri Apr 10, 2015 5:34 pm 
Offline
Site Rank - Old Salt

Joined: Sun Apr 20, 2008 6:18 am
Posts: 3062
Location: Sarasota,Key West FL
Vetgam:
Actually I might have a solution for you getting an outhaul line to pull the jib out to the side when sailing wing on wing downwind (the way I do it). I am also reluctant to keep on adding more lines and blocks. On my non wing jib I have two control lines, one for each tack. What I did was add two additional harken blocks to my front AKA brace (actually I have 5 alltogether mounted on the aka brace in the existing screw holes). The two outermost blocks inside the braces are for my jib control lines. I have very light 1/8" line (no need for anything super heavy duty). What i do is on the left side I run the line from the jib around the little button above the mesh pocket then forward around the front AKA crossbar then thru the harken cleat (this way the line cannot lift out of the cleat and release when sailing). My control lines are extra long (I will explain later why). Typically when I tack from left side to right side, I usually re-use the same settings over and over again. What I do is run the tack line from the jib back around that little button in the middle top of the mesh pocket on the gunwale, then up around the AKA bar then thru the harken cleat where it is adjusted and locked down. When on the other tack I do the same with the other line, adjusting the sail with the line wrapped over (not around) that little post. When on one tack I just grab one line and Pull it over that little post, leaving the other line off the post and just dangling. When I switch tacks I just take the line off one post and place the other one over the opposite post. No need to keep re-adjusting the tension each time (the Harken cleats stay locked unless I need more or less tension (like changing the point of sail, etc). This method works really well and is time proven to be simple and reliable (I've been usung that setup 5 yrs now on my TI). Now comes the really cool part, if I want to pull the jib way out to one side or the other (for wing on wing downwind), I just release more control line (why I have them longer than neccessary), then flick the line over the little button on the end of the AKA brace (the one above the one that holds the tramp on), then pull the line in and wrap in around the button near the mesh pocket. By doing this you can pull the jib to one side or the other crating a wing on wing effect (I also use a simple barbor hauler for the main). To release the sail you just pull it off the button by the mesh pocket, give it a flick to release off the outer aka button, and you back in business just regular tacking. All done with just two lines.
I tend to furl/unfurl my jib a lot depending on the conditions needed at that moment. To furl my jib I simply remove the control lines from the buttons, then grab the jib furler line (which is in another Harken cleat), and yank the furler line to furl the jib (takes about a second to furl or unfurl the jib) when unfurled all the lines are already set and locked in the cleats, I just pull the line over the button and I'm off again with the jib (really really simple setup). Now comes the really cool part (if you ever decide to add a furling spinnaker as well). The spinnaker is setup pretty much the same way (just FYI you never use both the jib and the spinnaker at the same time, either one or the other is furled). I can switch back and forth from jib to spinnaker in under 5 seconds, or visa versa depending what I need at the moment. No need to go into the spinnaker furling details right now, but if you ever decide to go to the dark side, let me know and I can help you rig it.
With my wing jib It's even simpler because I only need one control line with that, but thats another story.
Hope this helps (sorry bout the long explanation)
Bob


Top
 Profile  
 
PostPosted: Fri Apr 10, 2015 6:31 pm 
Offline
Site Rank - Old Salt

Joined: Sat Jan 14, 2012 8:24 pm
Posts: 780
Location: Houston, TX
Somewhere between the harkin block, an ama and a cleat I blacked out. I may need a picture. :shock:

Going to the garage to look at the boat and read this again.

Vetgam

_________________
Greg

2016 AI - Spinn & Jib

“Out of sight of land the sailor feels safe. It is the beach that worries him.”
– Charles G. Davis

Image


Top
 Profile  
 
PostPosted: Fri Apr 10, 2015 7:12 pm 
Offline
Site Rank - Old Salt

Joined: Sun Apr 20, 2008 6:18 am
Posts: 3062
Location: Sarasota,Key West FL
Sorry I tend to over describe stuff, forget everything else and just try flipping the control line over the post on the outer AKA bar (my main point)
Bob


Top
 Profile  
 
PostPosted: Fri Apr 10, 2015 7:24 pm 
Offline
Site Rank - Old Salt

Joined: Sat Jan 14, 2012 8:24 pm
Posts: 780
Location: Houston, TX
No problem. I can't find a button over the mesh pocket and there is where I glaze over. Maybe this is a TI vs AI thing.

I think the point is by wraping the jib sheet around the Aka brace once you are less likely to have a sheet slip out of the blocks while sailing (already happened to me by the way). Lost you on how to use that to pull the jib lateral to wing on wing.

Vetgam

_________________
Greg

2016 AI - Spinn & Jib

“Out of sight of land the sailor feels safe. It is the beach that worries him.”
– Charles G. Davis

Image


Top
 Profile  
 
PostPosted: Fri Apr 10, 2015 8:24 pm 
Offline
Site Rank - Old Salt

Joined: Sun Apr 20, 2008 6:18 am
Posts: 3062
Location: Sarasota,Key West FL
It must be just on the TI where they have the buttons and the bungy cord that holds the paddle to the side of the boat, on the older TI's those buttons are also to hold the AMA's in when folded in. It sounds like they must have removed all that crap for 2015. Sorry I didn't mean to lead you astray I don't know much about the AI.
Bob


Top
 Profile  
 
PostPosted: Fri Apr 10, 2015 9:45 pm 
Offline
Site Rank - Old Salt

Joined: Sat Jan 14, 2012 8:24 pm
Posts: 780
Location: Houston, TX
Now I understand. The button is on the AI but further back near the seat.

Vetgam

_________________
Greg

2016 AI - Spinn & Jib

“Out of sight of land the sailor feels safe. It is the beach that worries him.”
– Charles G. Davis

Image


Top
 Profile  
 
PostPosted: Thu Apr 16, 2015 2:40 pm 
Offline
Site Rank - Old Salt

Joined: Sat Jan 14, 2012 8:24 pm
Posts: 780
Location: Houston, TX
My original goal was a no-permanent-mods plug and play jib. Looks like we have it. I have one last change to test this weekend but I expect it to work well. The last challenge was to come up with a low cost simple way to attach the jib halyard to the mast. Instead of paying a sail maker to sew loops into the mainsail like I did, all you have to do is attach a loop of 1/4 line to mast head with Chinese Finger Trap type latching and a double sheet bend to complete the loop. The video below shows the final product minus the cutting and burning of the loose ends.

Will make a final instructional how to video once I'm happy with all the details.

http://youtu.be/Pwu7lY8Yll8


Vetgam

_________________
Greg

2016 AI - Spinn & Jib

“Out of sight of land the sailor feels safe. It is the beach that worries him.”
– Charles G. Davis

Image


Last edited by vetgam on Fri Apr 17, 2015 5:30 am, edited 1 time in total.

Top
 Profile  
 
PostPosted: Thu Apr 16, 2015 7:10 pm 
Offline
Site Rank - Old Salt

Joined: Tue May 18, 2010 2:31 pm
Posts: 3068
Location: Kailua 96734
I like it.

You are hereby officially invited to the Batcave. :mrgreen:


Top
 Profile  
 
Display posts from previous:  Sort by  
Post new topic Reply to topic  [ 133 posts ]  Go to page Previous  1 ... 4, 5, 6, 7, 8, 9  Next

All times are UTC - 8 hours [ DST ]


Who is online

Users browsing this forum: No registered users and 2 guests


You cannot post new topics in this forum
You cannot reply to topics in this forum
You cannot edit your posts in this forum
You cannot delete your posts in this forum

Jump to:  
© Hobie Cat Company. All rights reserved.
Powered by phpBB® Forum Software © phpBB Group