Return to Hobie.com
Hobie Forums
It is currently Sun Jun 22, 2025 5:17 pm

All times are UTC - 8 hours [ DST ]


Post new topic Reply to topic  [ 7 posts ] 
Author Message
 Post subject: Mast camera mount for AI
PostPosted: Mon Jun 27, 2016 2:45 am 
Offline
Site Rank - Captain

Joined: Tue Sep 18, 2012 11:56 am
Posts: 66
Location: United Kingdom, Hampshire
I've seen a few photos and some video footage taken from the masthead of Hobie Island kayaks and I love the view that it provides. However, I could find no information on the web regarding the actual design of a mount so I decided to go ahead and create my own. Here it is below.

Image

First thing to state is that if you fit the Genuine Hobie Spinnaker kit to your Adventure Island this mount won't fit!, sorry.

My biggest concern was attaching a mount o the mast itself, it needed to be none damaging and preferably without any modifications to the mast itself. These masts are not cheap!, damaging one or weakening one, quite simply wasn't an option. At the top of the AI mast is a plastic insert that is used to locate the sail securing strap (photo below)

Image

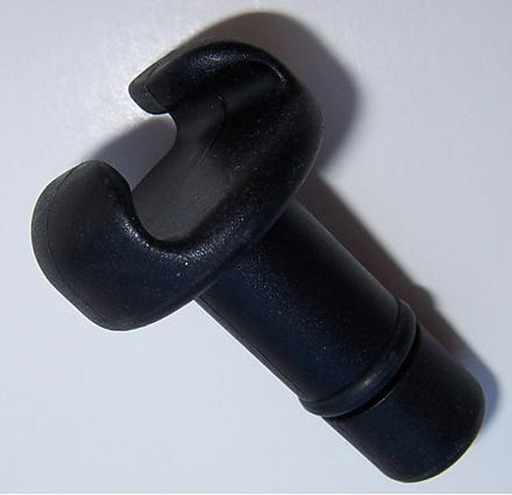
I noticed that with the strap fitted through this plastic insert that there was still approximately 3mm of clearance between the strap and the plastic lugs. I decided to try to utilise this gap to locate and secure a camera mount to the mast. I located a piece of aluminium of the correct thickness and cut off a long strip of the correct width, filing it down to a 'sliding fit'.

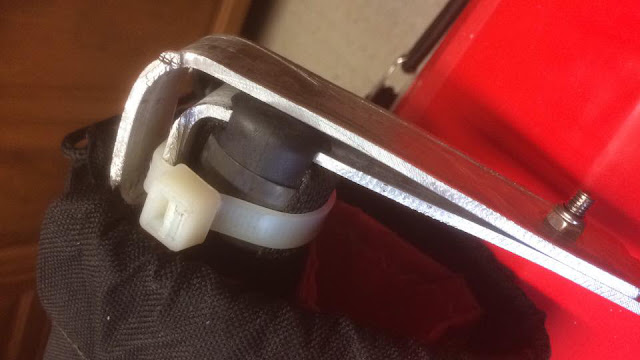
My first attempt (Mk1) saw me fold the aluminium strip over on itself, allowing it to slide through the plastic mast mount before securing it with a nut and bolt as shown below.

Image

Despite being a close fit in the mount, the bracket moved more than I liked so I added a heavy ty-wrap to lock it into position.

Image

This worked extremely well and I thought I had a good working solution. However, the more I played with it I noticed that if it was subjected to a decent knock it would vibrate for 1-3 seconds which I deemed unacceptable.

The basically made the Mk1 scrap metal, so I moved onto designing a strengthened Mk2 version.

The horizontal section that supported the camera really needed to be solid with zero flex. The only way that I could effectively achieve this was to add an upright section along this horizontal length, thus preventing any noticeable flexing. I also took this opportunity to modify the upright section, extending it to permit the fitment of a wind indicator. I purchased a Little Hawk Mk1 for this purpose. This is a very simple indicator that attaches to a vertical surface using two small self tapping screws.

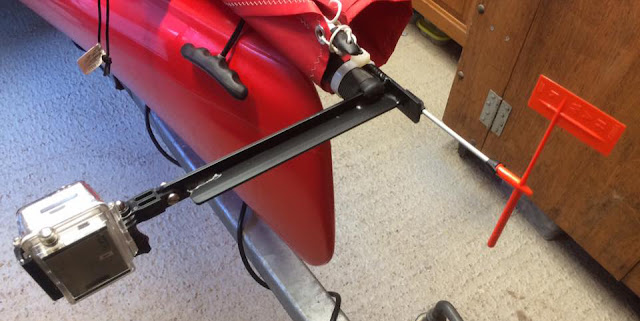
Below are a couple of photos of the welded and painted bracket. Being aluminium it's very lightweight yet its design makes it very rigid.

Image

Image

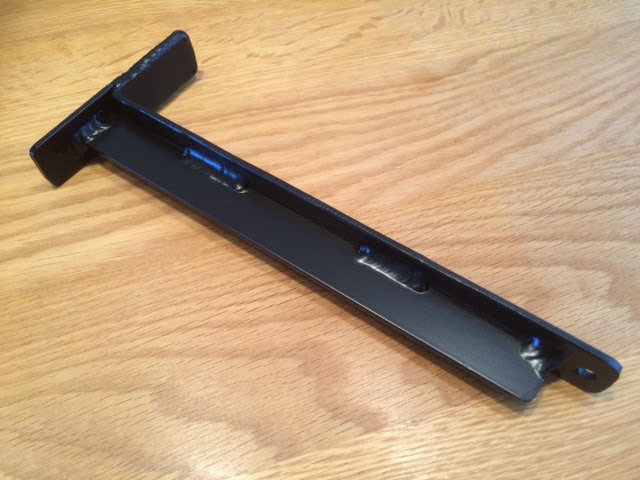
It slides into the top plastic mount on the AI masthead and it secured into position with a heavy duty ty-wrap as per the Mk1. It really is as simple as that and it's a very solid fit!, simple but effective as they say.

Image

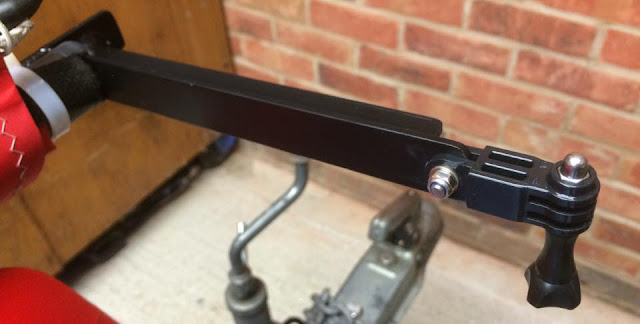
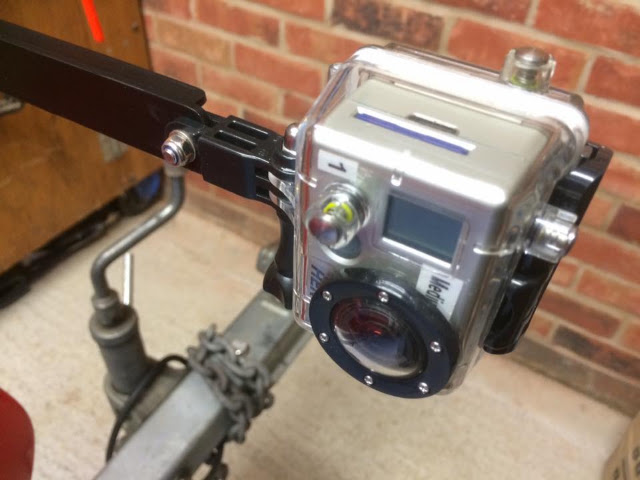
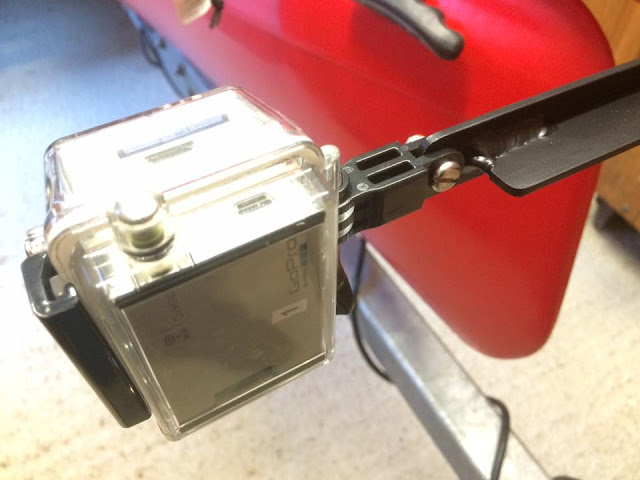
Note that a GoPro mount is fitted, I've used a nut and bolt as I envisage that the main bracket will remain fitted at all times, though you could use a 'wing nut' for quick removal of this mount if preferred.

Image

Image

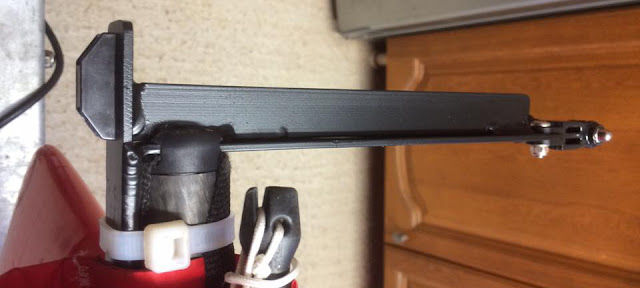
The Hawk wind indicator mount can be seen fitted in the above photo. This is a permanent fit.

Image

As mentioned, the bracket assembly is secured to the mast with a ty-wrap. Removal and fitment takes seconds!

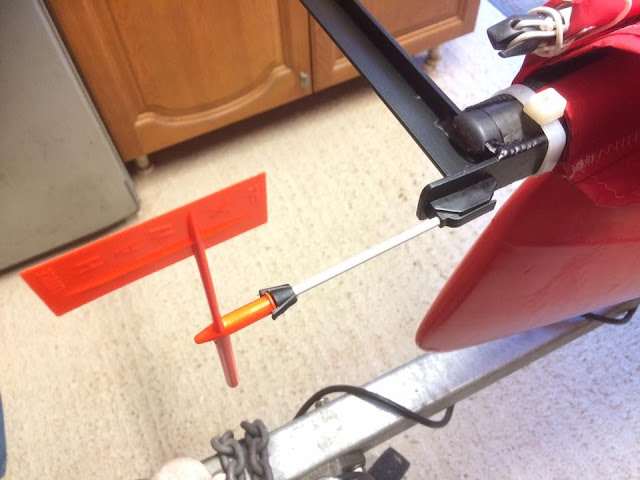
The Hawk wind indicator pushes in when needed and the GoPro is also attached on as as-required basis. The whole mount, wind indicator and GoPro can be assembled and fitted in a minute, literally.

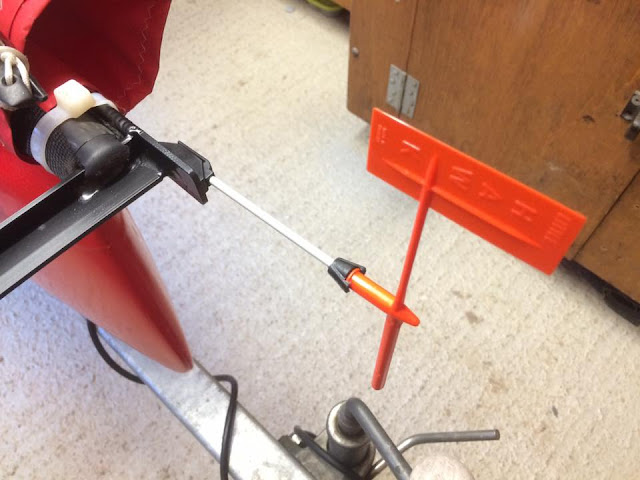
Below is the Hawk wind indicator fitted into its bracket.

Image

Image

Below is the GoPro secured to its mount.

Image

Image

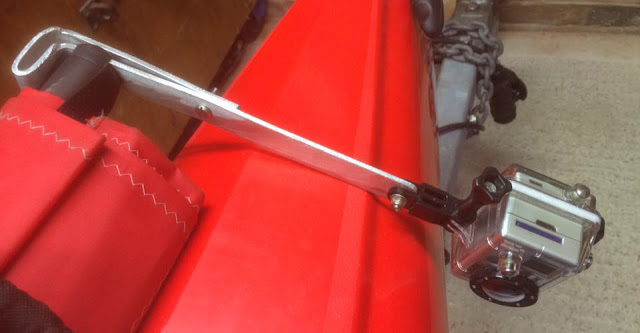
Below is the fitted 'Mk2' mount complete with camera and wind indicator.

Image

Image

I'm going to be testing it very shortly and I'll post up some of the results - fingers crossed!

_________________
Follow my blog @ Saltwater Kayak Fisherman
Watch my videos on You Tube
Team Hobie GB
Lowrance Pro Staff
YakAttack Pro Staff
Hook1 Crew


Top
 Profile  
 
PostPosted: Mon Jun 27, 2016 3:20 pm 
Offline
Site Rank - Admiral

Joined: Wed Aug 06, 2014 5:52 pm
Posts: 287
Location: North carolina
Nice. Thanks for sharing. Yes please share your first video.


Top
 Profile  
 
PostPosted: Mon Jun 27, 2016 7:08 pm 
Offline
Site Rank - Old Salt

Joined: Thu Aug 07, 2014 10:40 am
Posts: 927
Location: Blacklick, Ohio
Very cool! Now to adapt one to work with the hobie mast topper.

Sent from my SPH-L720T using Tapatalk

_________________
2015 Hobie Tandem Island Hibiscus
"Third Normal Form"

  • Trampolines
  • Hobie cover
  • Davis Spar Fly
  • Kayakbob's Sprayskirts
  • Spine Board Hakas


Top
 Profile  
 
PostPosted: Mon Jun 27, 2016 11:16 pm 
Offline
Site Rank - Old Salt

Joined: Sat Nov 05, 2011 1:58 am
Posts: 2893
Location: Forster, NSW, Australia
TI_Tom wrote:
Very cool! Now to adapt one to work with the hobie mast topper.

Sent from my SPH-L720T using Tapatalk

I reckon it would be doable Tom, but I suspect you would need a very light camera as well as counterweights, to avoid overpowering the delrin ballrace.

There is room front and back to insert (say) carbon arrow shafts terminating in a HPDE block just big enough to take the mounting for the camera. A small weight at the other end (the arrow shafts sticking through so equal amounts are exposed on each side) to avoid putting lopsided loads on the ballrace.

Unlike nap's solution, which would swivel directly with the sail, this one would rotate with the mast topper. Unfortunately, from my observations, that can be quite erratic jerks through a small angle. The ideal outcome is to have the camera free to rotate the mast in a large arc, as per Matt Coburn's spectacular efforts. I have no idea how that could be incorporated with the mast topper.
https://www.youtube.com/watch?v=VqdQL90sDVo

_________________
Tony Stott
2012 Tandem Island "SIC EM" with Hobie spinnaker


Top
 Profile  
 
PostPosted: Mon Jul 04, 2016 8:37 am 
Offline
Site Rank - Admiral

Joined: Sun Feb 22, 2015 9:58 pm
Posts: 219
Location: SF Bay
tonystott wrote:
The ideal outcome is to have the camera free to rotate the mast in a large arc, as per Matt Coburn's spectacular efforts. I have no idea how that could be incorporated with the mast topper.
https://www.youtube.com/watch?v=VqdQL90sDVo


tonystott,

Love this video!

Do you know if Matt Coburn has detailed his mount on the forum or elsewhere?


Top
 Profile  
 
PostPosted: Mon Jul 04, 2016 11:00 am 
Offline
Site Rank - Old Salt

Joined: Sat Nov 05, 2011 1:58 am
Posts: 2893
Location: Forster, NSW, Australia
scc wrote:
tonystott wrote:
The ideal outcome is to have the camera free to rotate the mast in a large arc, as per Matt Coburn's spectacular efforts. I have no idea how that could be incorporated with the mast topper.
https://www.youtube.com/watch?v=VqdQL90sDVo


tonystott,

Love this video!

Do you know if Matt Coburn has detailed his mount on the forum or elsewhere?

Not that I am aware of.. I recall him mentioning that it is free to swing around the mast, presumably dictated by the direction the mast is leaning. It seems to move so gracefully, he really has hit the jackpot there.

_________________
Tony Stott
2012 Tandem Island "SIC EM" with Hobie spinnaker


Top
 Profile  
 
PostPosted: Mon Jul 04, 2016 4:50 pm 
Offline
Site Rank - Old Salt

Joined: Thu Aug 16, 2007 2:25 pm
Posts: 2866
Location: Central Coast NSW Australia
Scrumpy, nice work on that mast mount and great documentation. 8)

I was very interested in a rotating mast mount like Matt Coburns when he first posted his surfing video in this forum here:
viewtopic.php?f=32&t=53004&p=243818#p243818
He didn't provide details on his mast mount but if you look closely, when the boat is righted, a shadow is cast on the sail that gives a bit of an idea. I researched rotating mounts and I believe his mount is very similar to this one:
http://www.diygopro.com/diy-gopro-swive ... -improved/
I ended up making this from the ideas found in the above link
Image
I upgraded my GoPro last year to the Silver model so I could get the wifi benefits that allow remote control by a smartphone app.
Truth is I've only used it once. I found the video to be boring just sailing around and the constant rotating gets annoying.
Also you don't get a long battery life on wifi and changing batteries is a real pain!
Matt's video works so well because of the exciting subject matter and editing. Rotating footage is best viewed in slomo.
It does allow for interesting still shots though:
Image


Top
 Profile  
 
Display posts from previous:  Sort by  
Post new topic Reply to topic  [ 7 posts ] 

All times are UTC - 8 hours [ DST ]


Who is online

Users browsing this forum: No registered users and 2 guests


You cannot post new topics in this forum
You cannot reply to topics in this forum
You cannot edit your posts in this forum
You cannot delete your posts in this forum

Jump to:  
© Hobie Cat Company. All rights reserved.
Powered by phpBB® Forum Software © phpBB Group