Return to Hobie.com
Hobie Forums
It is currently Fri Aug 22, 2025 3:06 pm

All times are UTC - 8 hours [ DST ]


Post new topic Reply to topic  [ 10 posts ] 
Author Message
PostPosted: Thu Apr 07, 2011 7:24 pm 
Offline
Site Rank - Captain

Joined: Fri Jul 06, 2007 9:13 am
Posts: 135
Location: Shepherd, Michigan
I have been working on my rudder castings to install on my set of brand spanky new H18 hulls...these hulls come from the factory with the one piece cast euro gudgeons...which have an interferance fit with the lower casting. So it takes a bit of work on the lower castings to get everything to fit, but the results are worth it!

Thought I would post this in case anyone else is looking to do the upgrade...plus there are a few other ideas thrown in as well.

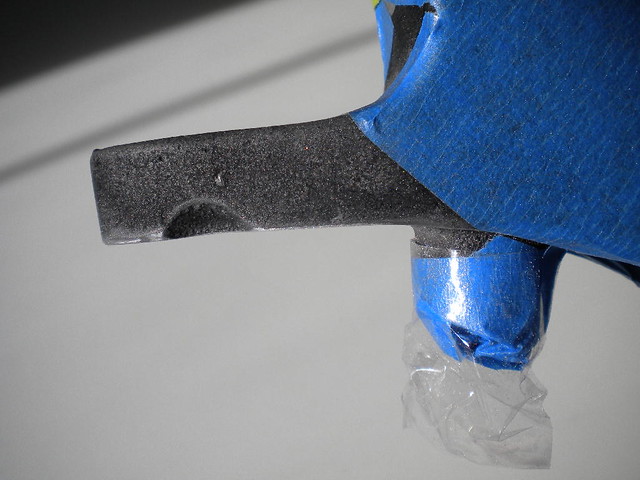
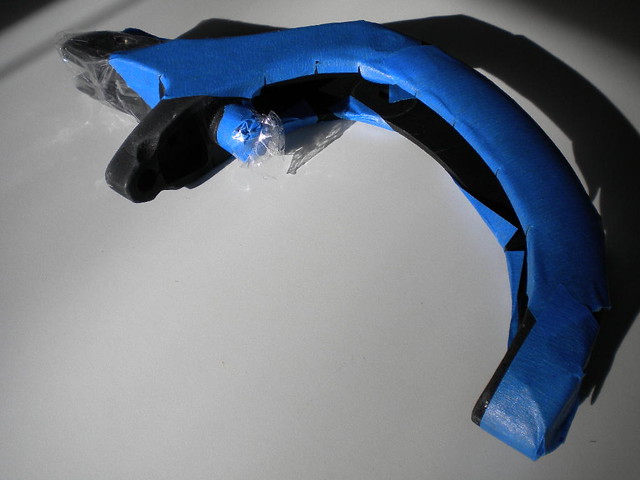
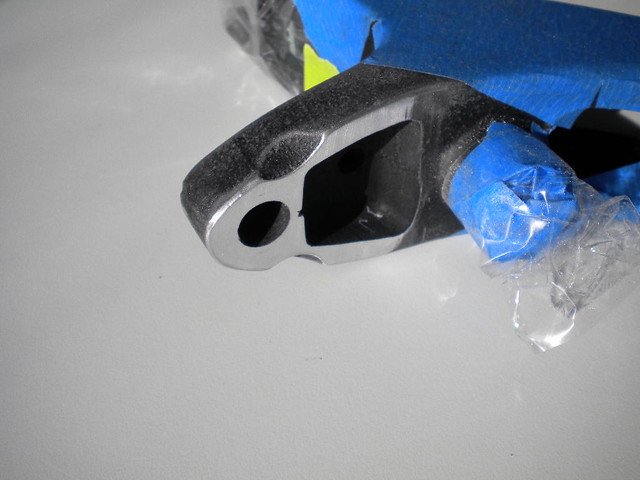
In all, it takes between .200" to .250" (about 3/16 to 1/4 inch) of material to be removed from the lower casting in order to have the casting fit onto the gudgeon attached to the hull. This is without removing material for using the stainless steel washer in the assembly as is the regular rudder assembly practice...I am going to moniter how the plastic bushing shoulders in the euro gudgeons wear...but I don't think the washer will be needed, and I really didn't want to remove any additional material if not necessary. I used painters tape to keep from scratching the castings while handling them (they are new), and the blue tape on the bottom is lined up with the initial "rough out" mark. Also tape every orifice off to keep dust out.
Image

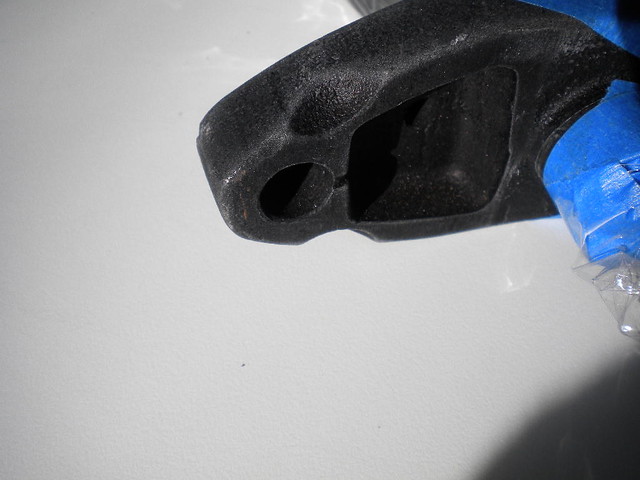
I removed .060 to .065 from the top part of the lower casting just to square everything up where it sits on the bushing in the gudgeon (both gudgeons and rudder castings use bushings), and then removed the remaining material off the bottom of the rudder casting (.150 to .180, depending on the side, each casting is unique) in order to maintain clearance away from the drain plug housing on the hull (not much extra room, so plan accordingly). This also took care of about 99% of some surface casting porosity. It is nice to square these surfaces up since they ride against the large shoulder of the bushings in the euro gudgeons; it helps to spread the load out and minimize early wear.
Image

Image

Image

Image

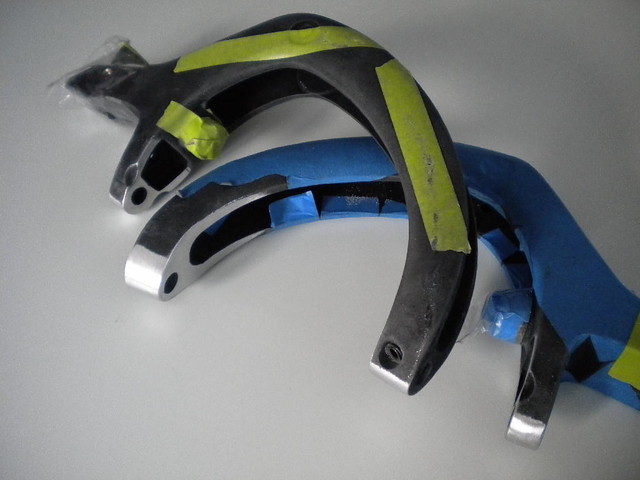
In addition to that, I had to remove a surprising amount of material around the perimeter of the castings since the 1-piece gudgeons don't extend out from the hulls as far as regular stainless gudgeons (material removal required to allow clearance / casting rotation).
Image

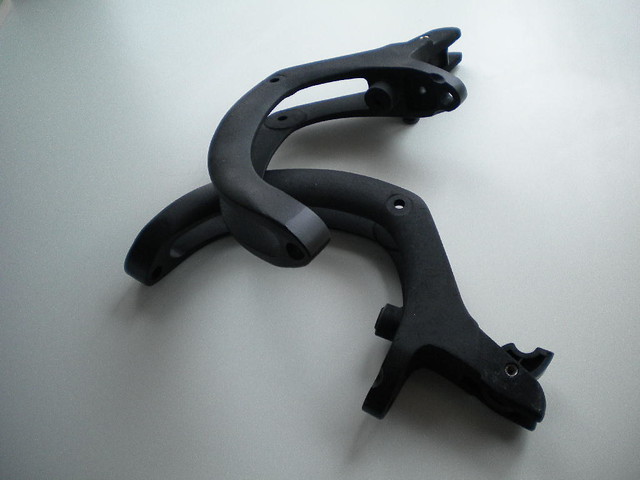
I faired the removed material into the rest of the castings both for looks and to avoid stress concentration (the 'step' that resulted from the initial material removal). Cleaned & touched up the castings with some custom-blended paint...might not last as long as re-anodizing, but I am not in salt water, either. Cleaned with near boiling hot water...does a great job of getting rid of the grey aluminum dust and getting everything back to black again.
Image

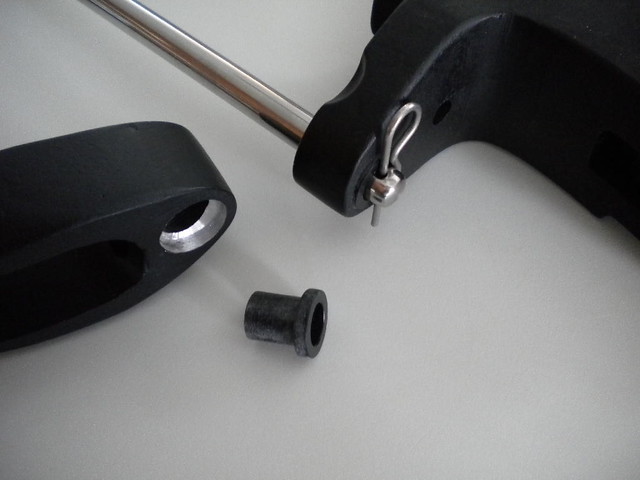
Counterbored the rudder pin holes for the nylon bushings which made a HUGE difference in the amount of "play" in the bushing...they are kind of a sloppy fit otherwise, even brand new. Capturing the shoulder of the bushing really tightened things up nicely, and should help keep them epoxied in place.
Image

I scuffed the outsides of the bushings before gluing in...I have had problems with epoxy sticking to these before.

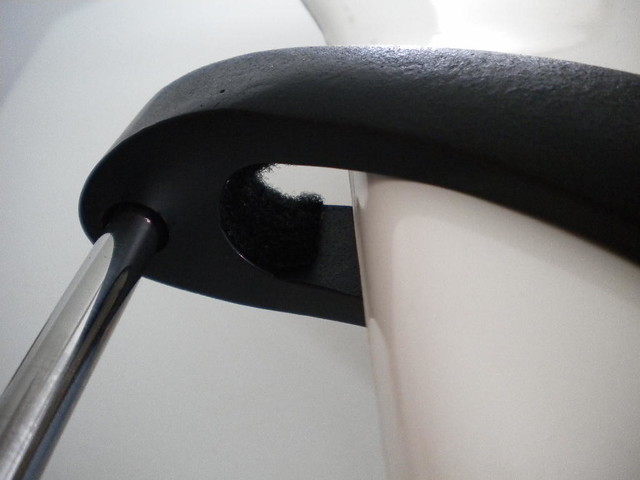
The top bushings (see pic above) I left slightly proud to facilitate retainer pin removal and to keep the retainer pins from rubbing on the castings. Rudder pins are custom polished stainless for a silky smooth feel (for now, at least!).

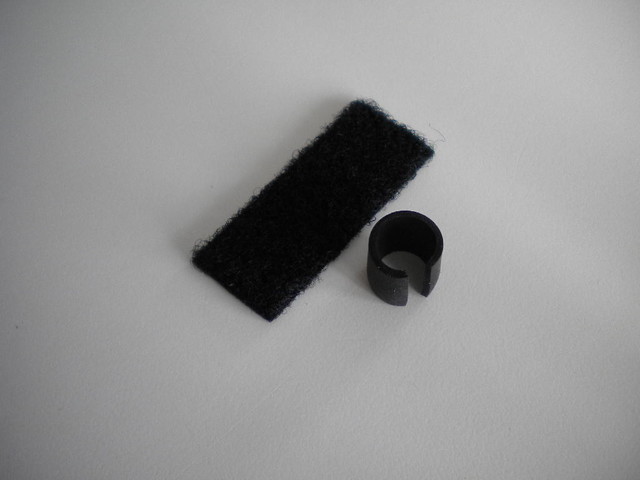
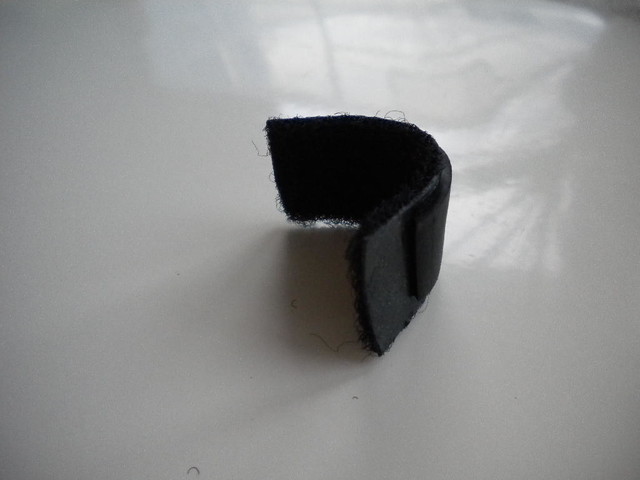
I set my blades up raked forward, and have had good luck using 3M adhesive backed velcro (use the fuzzy side only) as a bump-stop against the casting...use a sliver of rubber (stolen from a soft-grip ink pen) underneath for even more protection or as a shim if needed.
Image

Image

Image

A lot of work & time to get them this far, but I am happy with the way they are turning out.

Eventually I'll post a few ideas I've learned for drilling rudder blades...getting them where you want...accurately.


Top
 Profile  
 
PostPosted: Fri Apr 08, 2011 4:02 am 
Offline
Site Rank - Old Salt

Joined: Sun Aug 26, 2007 5:40 am
Posts: 463
Location: Metuchen NJ
I've been considering doing this upgrade to my gudgeons. Thanks for posting the tutorial!

_________________
Chris
'88 H18SE Arís


Top
 Profile  
 
PostPosted: Mon Apr 11, 2011 2:24 pm 
Offline
Site Rank - Admiral

Joined: Sat Jul 23, 2005 10:04 am
Posts: 237
Location: Bowie, MD
Nice!

What kind of tool did you use to remove the casting material?

Jim


Top
 Profile  
 
PostPosted: Sat Apr 16, 2011 10:00 am 
Offline
Site Rank - Old Salt

Joined: Thu Sep 24, 2009 5:50 am
Posts: 378
Wow, impressive. They look great! I'm looking forward to seeing pictures of the final product installed (along with your other goodies) on those gorgeous new hulls.


Top
 Profile  
 
PostPosted: Sat Apr 16, 2011 10:43 am 
Offline
Site Rank - Captain

Joined: Fri Jul 06, 2007 9:13 am
Posts: 135
Location: Shepherd, Michigan
jim-doty wrote:
Nice!

What kind of tool did you use to remove the casting material?

Jim


Mostly a vertical edge sander for rough out, 12" disc sander for squaring and truing, spindle sander for fairing the radii, assorted hand files and sanding blocks for detail work...plus probably a few other things in the heat of the moment. A trustworthy set of dial calipers will save you a lot of time. Measure often!


Top
 Profile  
 
PostPosted: Mon Apr 18, 2011 9:33 am 
Offline
Site Rank - Deck Hand

Joined: Wed Jan 27, 2010 6:56 am
Posts: 14
Location: Auckland, NZ
Thanks for posting this Caleb. I managed to get mine on, though I do need to do a bit more squaring and truing. I look forward to seeing the rudder drill guide as well. Nice to see craftsmanship.


Top
 Profile  
 
PostPosted: Mon Apr 18, 2011 2:15 pm 
Offline
Site Rank - Old Salt

Joined: Wed Jul 21, 2004 7:46 pm
Posts: 1457
Location: Santa Cruz
Very, very nice work!

_________________
Sail Revolution
Join us on our new FB Page!


Top
 Profile  
 
PostPosted: Mon Apr 18, 2011 10:55 pm 
Offline
Site Rank - Old Salt

Joined: Wed Jul 21, 2004 7:46 pm
Posts: 1457
Location: Santa Cruz
Paging Mr. Hotline Editor...

_________________
Sail Revolution
Join us on our new FB Page!


Top
 Profile  
 
PostPosted: Tue Apr 19, 2011 4:15 am 
Offline
Hobie Approved Guru

Joined: Mon Jul 14, 2003 7:11 pm
Posts: 5198
Location: Detroit, MI
Surf City Catamarans wrote:
Paging Mr. Hotline Editor...

You rang?

To do a TOH article for this (and this would be a good subject) - we need another half dozen high-res photos and a step-by-step story.

Paging Mr. CMS . . . .


Top
 Profile  
 
PostPosted: Tue Apr 19, 2011 5:20 am 
Offline
Site Rank - Captain

Joined: Fri Jul 06, 2007 9:13 am
Posts: 135
Location: Shepherd, Michigan
Unfortunately...these photos (and the actual finished product) are ALL that I currently have...I suffered a massive hard drive failure last week, on a computer with additional internal hardware issues...so I lost a few folders of pics since the last backup. SO...life is short, time to move on and help the economy out (the old one was !nine! years old and likely had logged over 100K miles on real highways, much less billions of miles on the information superhighway).


Top
 Profile  
 
Display posts from previous:  Sort by  
Post new topic Reply to topic  [ 10 posts ] 

All times are UTC - 8 hours [ DST ]


Who is online

Users browsing this forum: No registered users and 2 guests


You cannot post new topics in this forum
You cannot reply to topics in this forum
You cannot edit your posts in this forum
You cannot delete your posts in this forum

Jump to:  
© Hobie Cat Company. All rights reserved.
Powered by phpBB® Forum Software © phpBB Group